Antony Rappai

Tech Director & DPO in Education | EdTech Solutions Architect | AI/API & Low-Code Integrationist | Investing Enthusiast

Category: Network & Servers

  • Why Schools Should Move to a Hyper-converged Infrastructure

    Why Schools Should Move to a Hyper-converged Infrastructure

    It’s no secret that the legacy IT infrastructure is at risk of failure, threatened by the growing demands of future enterprise applications and the nature of modern business. Having separate storage networks and servers results in the creation of silos which prove to be a barrier to the evolution of the infrastructure and add complexity to every single step from deployment to management. So what’s in the store for most modern businesses in the coming times? It’s Hyper-converged Infrastructure. Read on to learn more about this topic and understand why schools need to move to a Hyper-converged Infrastructure.

    Evolution of the IT Infrastructure Until the early 2000s, physical infrastructure, which comprised of a traditional data center, was the norm. Between 2003 and 2010, companies started the adoption of virtualized data centers as the virtualization revolution made it easy to pool together the resources of the network, computing, and storage from multiple siloed data centers to form a central, more reliable and flexible resource which could be reallocated based on the requirements. By 2011, close to 72% of organizations claimed at least 25% of their data centers were virtual. Then came the age of SAN and use of fiber channels, and IT infrastructure seemed to evolve rapidly. Fast forward to today, one of the significant challenges in IT today is that organizations tend to spend 70 to 80 percent of their total budget on operations alone, which includes optimization and maintenance of the infrastructure. Server virtualization did offer the benefit of improved utilization of computing resources but had a negative impact on the networking and storage components. So, for IT, though server virtualization wasn’t the definitive answer, it was a step closer to the ultimate solution – hyper-converged infrastructure (HCI).  It makes sense for organizations to move to environments that are relatively easy to manage and require much lesser resources to maintain.

    So, there are mainly two options available: Make the environment simplified by using a hyper-converged infrastructure, or outsource all (or part) of the Infra to some third-party cloud provider which can be a very costly affair (more on this later). What Are the Main Benefits of Using Hyper-converged Infrastructure?


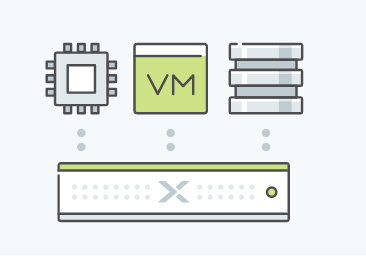
    1. Simplified Datacenter Operations: By using hyper-converged infrastructure, it becomes possible to streamline the deployment, management and consequent scaling of the data center resources by merging x86-based server and storage resources along with an intelligent software solution. Instead of using separate servers, storage arrays and storage networks, we can go with a hyper-converged infrastructure solution and create an agile datacenter which can scale as your needs grow.

    2.Ability to Extend to the Public Cloud: Both HCI and the public cloud leverage flash-enabled servers along with a software abstraction layer which is hardware-agnostic. As a result of having a standard hardware building block and an architectural affinity, it becomes possible to extend the common storage control planes of HCI to the public cloud

    3.Cost Savings: An efficient HCI design results in as much as 40 to 60 percent savings on costs by eliminating the need for separate storage networking hardware and proprietary storage. This significant economic benefit will drive the adoption of HCI in scenarios where cost savings are required. Furthermore, HCI reduces operational costs by up to 50 percent by consolidating the storage and virtual computing management into one management console. In the case of HCI, there’s no need to have independent storage administrators as storage is just an attribute of a virtual machine.


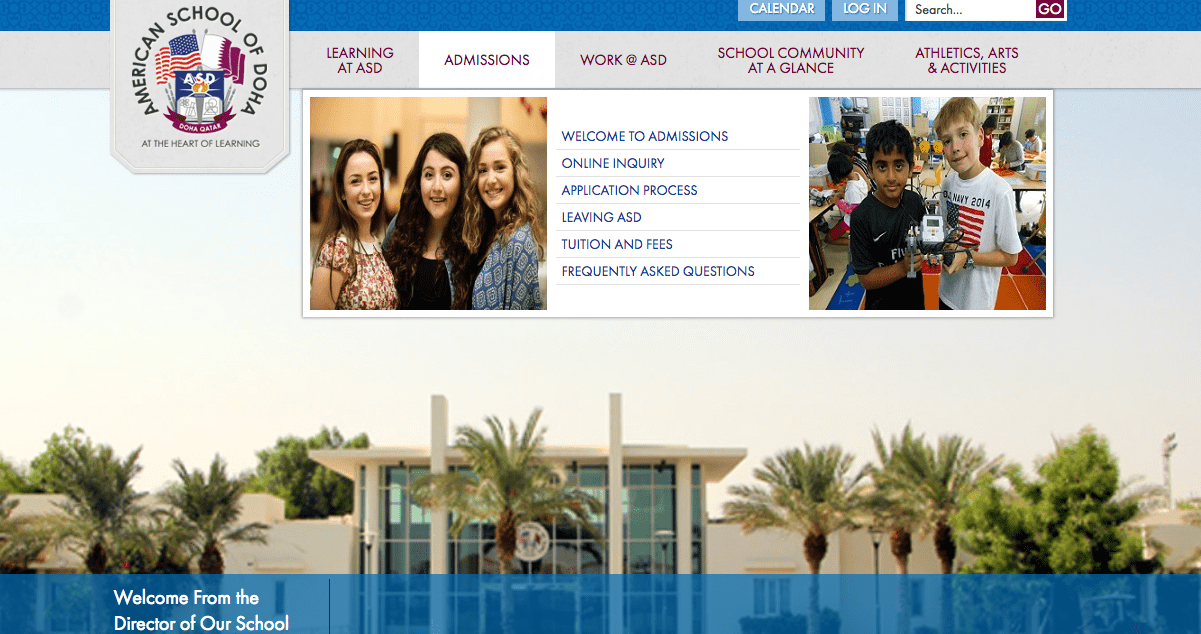
    Case Study: American School of Doha

    This example will help you understand the nature of benefits that HCI offers. While I was the Sytems and Network Admin there, I proposed, researched and helped implement the Hyper-Converged Nutanix Infrastructure. Here are some of the challenges that I was trying to solve

    • Management overheads
    • A high amount of time required for maintenance
    • Significant licensing costs
    • Limited physical space
    • The need for a separate SAN and Virtualization specialist.

    We had to make a tough call between Cisco Hyper-Converged Infra and the Nutanix Hyper-Converged Infra, in the end, we were convinced that Nutanix was the way to go. They were the pioneers and the ability to use the inbuilt Nutanix Hypervisor and not having to manage a separate layer of hypervisor like Vmware or Citrix on top of the HCI was a huge benefit for us in terms of licensing and time spent.

    Considering downsides that come with the infrastructure that relies on traditional SAN’s and Blade Servers, it made complete sense to switch to the Nutanix Hyper-Converged Infrastructure in this case. The transition resulted in significant cost savings plus other hosts of benefits that I’ve shared above. The need to improve efficiency Not only will it be easy to deploy, manage and scale an HCI, but it will also be far more efficient as compared to a traditional virtualization solution that your school might be currently using. This means lesser overheads and better performance. This point alone makes it a no-brainer to go for HCI than a SAN solution. Ask yourself, What would you want your school’s tech department to focus on: helping teachers and students in teaching and learning OR managing the infrastructure? The answer is simple: helping teachers and students! It just makes sense for your tech staff to focus on the more critical aspects like this rather than solving technical redundancies. It’s all about priorities and what matters to you the most, so pick your options wisely!

    Conclusion:  By relying on HCI solutions such as Nutanix. It becomes less time-consuming to maintain the server infrastructure. As a result, it frees up the time of your tech staff to focus more on helping teachers and students, This way your school can achieve far better results from the available resources (staff and operation costs). So if you want to gain the host of benefits that come with hyper-converged infrastructure, maybe it’s time to switch. Just like the significant success of the IT infrastructure changes I helped carry out at the American School of Doha, your school too can lead the wave of change 

    Thanks for reading this article! Share your views on this topic in the comments section below. Good luck!


  • Thinking about revamping your school website?

    Thinking about revamping your school website?

    I have been trying to convince the School to move away from our overpriced Website hosting provider and moving to a more dynamic, modern website with WordPress and in the process save us at least 20000$ annually.

    Coincidently our Schools 30th anniversary was just around the corner, and our communications dept was in agreement about the facelifting our website, and we conceptualized the idea of our new, improved and revamped school website. How did the process go?


    First and foremost choose your Website platform 

    By website platform I mean a Content Management System (CMS), not to be mistaken for Course Management system like Moodle. There are at least 100 of them. Popular ones include Joomla, Magento (More for E-commerce), Drupal, Django, WordPress.


    What did we decide on?

    We decided to go with WordPress as I had tons of experience with it. Additionally, my mind was fresh of consulting with a couple of other international schools on their move to WordPress and choosing the right Hosting Provider. WordPress has been around for over two decades and has come a long way from being a plain old blogging platform to being capable of hosting large-scale websites with tons of features and modules. Some notable examples of sites on WordPress are

    • TechCrunch.
    • The New Yorker.
    • BBC America.
    • Bloomberg Professional.
    • The Official Star Wars Blog.
    • Variety.
    • Sony Music.
    • MTV News.


    Secure your Web hosting from day zero

    This is one thing that I can not stress enough about since WordPress is widely used, you need to lock it down pretty hard. Just due to its sheer popularity, it has become a very common target for hackers and bots, but there are multiple ways to keep it secure using IP Tables on your Linux server, Using wordfence Plugin, Cloudflare DNS & DDOS, etc.


    What else we need to decide ? or Worry about before getting your feet wet?

    Decide how you are going to host your WordPress

    There are multiple ways to host a WordPress site; you can host directly with WordPress, Amazon Web Services (AWS), Google Cloud. We initially thought about using wordPress.com, but we couldn’t integrate their Hosting plan with our Cloudflare DDOS & DNS, so we went about hosting it on our own Data Center.

    Additional Recommended Components of your Hosting platform if self-hosting or with any Cloud service provider. I won’t be writing in detail about each of the below steps in the setup, I am going to save for another post.

    • Ubuntu: This is the Linux OS that we decided to use, it is lightweight and perfect for hosting WordPress, in fact, it is recommended for WordPress by WordPress, it secure and releases regular security updates.
    • Webmin: This is a web-based GUI that makes managing Linux servers a breeze, it has pre-built scripts to install everything needed for WordPress – that included PHP, MySql, Apache, permissions, it also has pre-built IP Tables modules built-in with a default set of rules, good thing about this is that it opened me to the whole world of IP tables. With Webmin, you can manage a whole lot of aspects about the Linux server, otherwise for which you would have to know a lot of the Linux Shell commands.
    • Cloudflare: Cloudflare is cloud-based Content Delivery Network (CDN) & Web Application Firewall ( WAF ). At the most basic level, this prevents your site from DDOS attacks and caches frequently used files like JPEG, Videos to make your site load faster. Cloudflare is an absolute must if you are using WordPress, this acts as the first layer of defense. I would highly recommend using this for any of your public-facing websites as well. For 20$ month you can get additional WAF ( rules that prevent your site from Cross-site scripting attacks, SQL injection attacks.
    • Wordfence: Wordfence is a long time running IPS/IDS for your WordPress site, this is very popular, and the free version had enough features to keep you away from unwanted traffic, bots, hack attempts. Now you must be thinking but why so much security? Well as I mentioned earlier, the popularity of WordPress is attracting a lot of attention from hackers and bots from around the world, so you have to be careful.


    Choose a good theme that is actively updated and has good support, how do you find that out?

    We went with an excellent theme from ThemeForest, one that was extremely customizable as per our needs and came packed with a ton of features. They have amazing Demos which gives an idea of the functionality that’s packed within. Initially, I was a bit skeptical about using a theme that is very popular because I was worried about it being a target for hackers, but it is better to use a theme that takes security seriously, updates frequently and one that has excellent support.

    The below points are markers for choosing a good theme, keep these points in mind when you select your theme.

    • Good support / Good support portal with FAQ & Support forums.
    • There should be regular updates released, look for changelogs to see how far they have progressed.
    • Check popularity and Reviews of the themes.
    • Look for a theme that is responsive ( where the page adapts to the size of the screen – whether mobile or desktop )
    • Check the community forums for that theme to see how responsive they are.
    • Look for themes that are professionally developed by a team of developers/company rather than one guy.


    Choose a team of four to five members with the below skill set

    • Basic coding skills and ability to understand and explain complex processes, experience with Linux servers, hosting, firewall, SQL, Site migration, etc. ( this guy is me BTW 🙂
    • A person who can take good pictures, video and has an eye for quality photos and editing them
    • A fresh of the boat programming Intern would be nice if your budget allows, to do a lot of the mundane tasks and custom coding, CSS, javascript, etc.
    • A person who can write good content and can follow with departments to clean up the content and give out good ideas like adding certain colors in Elementary school or Adding stat boxes for each division etc.

    You may not need someone with extensive coding knowledge, because in WordPress most of the content and page building is done on a DIY drag & drop editor. It all depends on the Theme that you use. You need to be patient and read through the theme documentation, about 99% of your questions are already answered in the forums and documentation for that particular theme. But none the less it helps to have a person with intermediate coding knowledge.


    What else did we find out?

    You have to factor in at least five months for the whole process. You then need to test it and do a soft launch for one month. A couple of other things you may want to check are, see if all the forms are working, like contact forms for admissions, withdrawal forms, school info, and address, etc.

    • Have weekly milestones
    • Never Rush into this project
    • Meet every week to discuss milestone achievements
    • Form a panel of 5 parents, five staff to test run the site and ask for suggestions


    The End Result 

    From this 

    Screen Shot 2018-10-01 at 9.12.26 PM
    Old School Website


    To this 

    screen-shot-2018-10-01-at-9-14-06-pm.png
    New School Website


    Quite frankly I wouldn’t do this post any justice till you checked out the full website at https://asd.sch.qa


    Do you need help with rebuilding your School website? Need some free consultation? If you are part of a “Not For Profit School”, then please fill in the contact form and get in touch with me.


  • Our Recent Network Overhaul.

    Our Recent Network Overhaul.

    Last year I convinced the School to go for a complete network overhaul keeping the long-term technological requirements of our school in mind.

    What were the upgrade requirements?

    • Gigabit switches with ten-gigabit uplinks
    • Core Cisco(Cat 6500) network switches had to be upgraded with the newer Supervisory module that supported 10 G fiber modules.
    • Wireless access points with AC technology
    • A firewall that can support over 10000 concurrent connections, IPS, IDS, Malware Prevention & packet shaping.

    The reason: Our network infrastructure was aging, reached their end of life. With the existing 1g uplinks, we were facing bandwidth bottlenecks, loss of instructional time for the teachers and students due to wireless and network troubleshooting plus we were not equipped to upgrade our server infrastructure in the future to support 10g or 40g uplinks.

    What did we decide on ?: We did some extensive research on Cisco, HP, and Meraki and decided to go for cloud-based Meraki solution. The management of the access points and switches seemed simple and did not require a ton of technical knowledge as compared to the Cisco controller-based wireless and traditional command line based switches, the Meraki provided a simple, intuitive GUI to make magic happen, I was a bit skeptical  about requiring an internet connection for managing the bulk of our network. But we went ahead and decided to go for the Meraki MS350 for our switches, MR 42 for indoor access points, MR 72 for our outdoor access points. Meraki MX 600 for our firewall and upgraded our Cisco Core with Supervisory module VS-S2T-10G, which enabled us to go 10G and future proofed for 40G.This entire investment came to about 1 million $. I was going to miss the traditional command line utility for managing Cisco Network because I invested a lot of my time and energy in learning that plus it made me look too cool :)We went with a trusted partner who had tons of experience with providing network solutions.

    How did it all go? We took the summer break as the perfect opportunity to do all the installation, which went on for roughly a month. We had a few quirks with the technical setup and such, but the availability of support 24/7 via Chat and Phone with Meraki I was a huge benefit.

    Meraki WiFi Pros:

    • Manageability: A Beautiful dashboard with a consolidated view of the current clients, Access points status and switch status was a blessing in disguise, this helped us identify faults and be proactive.Easy to set up and configure the Access points, it was easy to create SSID’S, VLAN, change the radio settings &Channel width, monitor channel interference, monitor the clients on the AP, restart them etc.. One really cool feature was the ability to tag access points for, e.g., you could tag the access points on the 7thgrade with anything, and you could search for access points with a particular tag and monitor just them and make bulk changes.
    • Security: Meraki AP provides Layer 3 & 7 firewall on an SSID level, which enables us to block certain applications, ports, IPs and sites for the student SSID while keeping them open for the staff SSID, Air Marshal feature from Meraki can be set up in such a way that all rogue SSIDs connected to the School network is contained. 
    • Traffic Shaping: it is even possible to set traffic shaping rules on an SSID level for e.g. We can set up rules in such a way that a single client in a particular SSID cannot cross over 1 MB per second.
    • Access Control: You can setup SSID authentication via Radius server or login VIA splash page & LDAP, additional parameters include checking your computer for Antivirus before letting you use the network, etc. For using Radius server there is documentation on setting up a Windows server 2012 as a Radius server, I would recommend it and setting it up in such a way that only machines in a particular group in active directory can connect to the SSID – of course, you can’t use it on the mobile devices 
    • Additional features: There is a Packet capturing tool(you can capture the traffic to and from the client and AP) for some advanced troubleshooting.Cable testing from the AP to the switch port. Supports 80 MHz on the 5GHz band to take advantage of the Wireless AC to utilize bandwidth between the clients up to 700 Mb per second.

    Firewall pros:

    • Firewall settings: layer 3 & 7 firewall rules can be set up at the firewall level, adding them to the firewall and SSID is what I would recommend because we want to try and contain the threat at the first point of contact (which is the AP ), so the valuable processing power of the firewall can be utilized for IPS, IDS, and NAT, PAT, etc.
    • Security Center Dashboard: Perhaps one of the top features of the MX 600 is the security center ( comes at a price by buying the Firewall Enterprise Advanced license ), the Security dashboard gives you a nice view of the malware and IPS threats coming in from around the world plotted on a world map. It also tells you the clients on your network with possible malware infections and contains them ( this is cool ) until we had the Meraki we had no clue on how many hackers and bots were trying to infiltrate into the network.
    • Access Control: You can set up Internet access Policy via LDAP groups, for e.g. You can say only members of the staff group in the AD can access certain applications and websites.
    • Setting up NAT and PAT is a breeze 
    • Load balancing: Dual WAN ports, so it essentially becomes a load balancer, this was a huge plus because we have to pay a serious amount of cash for a 100 Mb IP VPN internet connection (we are paying about 15000$ per month 😦 – but with the MX 600 we had the dual wan ports so we could buy a cheaper 100 Mb business fiber and double our bandwidth using the second WAN. It even has a backup 4g dongle provision in case both the WANs fail.you can also set up flow preference to have certain traffic go through WAN 1 or 2 


    MS 350 Switches pros:

    • VLANS: Easy to setup VLANs and trunk ports on the GUI, assigning access VLAN ports and voice VLAN ports is a breeze. 
    • Routing: L3 routing ( only on the MS 350) is possible too for advanced network topology, we don’t have much use with because of the way our network is set up.
    • Stacking: The MS 350 is capable of physical and virtual stacking
    • Security: Mac filtering is easy, and LDAP authentication is a breeze on an individual port level.
    • Advanced troubleshooting: Cable testing to see if all the pairs are crimped correctly, Ability to see which client is connected to which port & a Packet capture utility to analyze traffic between a switch port and wired clients.


    Wireless Cons

    • There is not much really, one thing I wished it had was the ability to set up the packet shaping for an entire SSID rather than an individual client on a per-AP level, this might be a bit hard to explain, for, e.g., our wireless is comprised of different SSIDs and each SSID is tagged with a particular VLAN, so it would have been beneficial for us if we could set it up to assign a certain amount of bandwidth for the entire SSID, meaning we don’t want the whole student SSID to cross more than 30 Mb in total which is not possible, you would need something like a blue coat packet shaper to achieve this. 
    • Weird issues with AP’s not accepting clients 
    • Some settings take a few seconds maybe even like a minute to get pushed to the APs because they are cloud managed the settings take a while to travel all the way from the internet to our local AP, even things like restarting the AP’s take longer than expected in some cases.
    • Noticed Some channel interference with Apple TV and Mac clients 
    • Some of the clients show up with the wrong names – looks like the reporting is taking time to update on the dashboard ( again this is the disadvantage of moving to a complete cloud solution )
    • The AC & 5 GHz capable Clients always seem to connect to the 2.4 GHz in spite of having excellent 5GHz strength. BTW the signal interface is much less on the 5GHz band, which is why I want them to connect to them in the first place 
    • The band steering feature in the Wireless SSIDs to try and move the 5GHz clients to the 5GHz band does not work as well as accepted and is flaky  

    Switch cons:

    • The wired clients show up with the wrong MAC address, sometimes the port where the wired clients are connected shows up wrong too, noticed this is an issue mainly with Apple TVs and Mac wired clients 
    • There is not a way to bulk restart all the switches at once; this would have been a good way to restart all the AP’s at once too.


    Firewall Cons:

    • Again the inability to set up the packet shaping for an entire VLAN rather than an individual client on a per-VLAN level is a major drawback.
    • Pricing on the advanced license is very steep.

    Other pros:

    • Easy to manage dashboard, accessible from anywhere 
    • Good for a school environment, because it is easy to maintain and you can free up some of your time to involve yourself in other cool projects.

    Other cons: 

    • Your entire network seizes to function if your support license has expired ( sounds pretty scary – don’t worry when they are close to expiry they do a good job of reminding you, you just need to find the $$) 
    • You need to factor in the price of the licensing over a long-term meaning ing you need to work out a Network keep alive cost projection for the lifetime of the equipment and that could be expensive for smaller organizations.

    I am sure I missed out a lot of points, but I will keep updating this post on a regular basis, so check back or contact me to know more if you plan on investing in Meraki, I can show you how we have it all set up.

  • Apple TV and Meraki headaches

    Apple TV and Meraki headaches

    Just when we thought our brand spanking new Meraki is working like a charm, we started getting calls from teachers saying that the Apple TV’s kept on disconnecting every few minutes and in some cases it would disconnect every few seconds, this got really frustrating – as we did not face many issues with our previous Cisco Wireless Setup.

    Its been over one month and we still haven’t figured out what is going on, we searched the internet to find help and tried them all, still no luck. If any of you are out there with a similar network setup, please read along to see how you could troubleshoot Apple TV issues

    Our Network Infra consist of 2 Cisco cores in VSS mode with multiple VLAN, all Apple TV’s are on a particular VLAN and wired

    All our Access points are MR42 & Switches be MS350 (no L3 routing enabled)

    Teachers are connected to a Staff SSID (configured in Bridge mode and WPA2)

    How did it all unfold?

    Initially, when our teachers started complaining, we would restart the AP and ask them to restart their computer, but then this became school-wide and spread like a virus – it kind of made the IT look bad because we just shelled out 1 million for this new Network Infra. I went into the classrooms multiple times to figure out what was going on and started doing a bunch of changes to the network – to the point where I even lost track of what all I did.

    What did I do?

    Minimum Bitrate: I changed this setting on the Meraki SSID to 36 Mbps – that means no more 802.11b devices, well tough crap for anyone who still has them. This means no more of those old devices would fight for valuable airtime leaving more bandwidth for the rest of the school owned devices; the roaming seemed better too after I changed this setting

    Dual-band operation with band steering: this was recommended by some experts in order to increase the utilization of the 5GHZ Band which has much less interference, I thought this would do the trick, my gut was telling me that getting the Apple Macs to use the 5GHZ would be the answer, the 2.4ghz is used largely and has better range, but it also comes with ton of interference from microwaves, neighboring SSID’s, hotspots, etc . but this setting seemed to have caused more harm than good, because now I started noticing that the Mac clients were constantly hopping between the 2.4 and the 5Ghz band where I noticed a pattern where the Mac would get disconnect from the ATV when the client kept switching radios ( not AP’s or SSID )

    Manual 5Ghz Band Assignment: Since I couldn’t turn off the 2.4Ghz radio on the SSID because I still had a ton of devices that needed them, I decided to start manually turning off the 2.4Ghz on individual AP’s to try and force the clients to use.                                      Did I have any luck ? not really, the disconnections were still intermittent, some teachers started saying it was better and some started saying it was worse. Felt I was getting back to square one every time.

    Now this became a dangerous obsession, and I created a Meraki Support ticket, and they asked me to capture the packets using their packet capture utility, while that feature was not working just when I needed it the most, I decided to sit in the classrooms and started monitoring the behavior of the clients with regards to the WiFi connectivity.I also read some articles on how the Mac and Apple TV connect via Bonjour and that the apple tv used channel no: 6 on the 2.4Ghz and 149 & 153 on the 5Ghz for their peer to peer communication.

    Read this http://community.arubanetworks.com/t5/Technology-Blog/Apple-TV-Peer-to-Peer-using-WiFi-channels-6-and-149/ba-p/223027

    & this http://help.apple.com/deployment/ios/#/apd8fc751f59

    Now I started to find patterns on client’s that were connected to the SSID on channel 6,149 & 153 were dropping their ATV connections more frequently.

    Manual Channel assignment: After I had read the above two articles, I started manually changing the channel to anything other than 14

    Channel width: The channel width on the 5GHz band was set to 40MHz, upon Meraki support engineers recommendations I set it to 20 MHz which means the wireless AC clients could not utilize the full glory of the AC network, but at this point we needed stability, plus in dense AP environment it is highly recommended to reduce the Channel width, the channel width could be set to 40 or 80 MHz in an auditorium or outdoor AP when the Access Point density is less.

    Did this all work out in the end? 

    A combination of the tinkering with the channel width, manually disabling the 2.4 GHz band and manual assignment of channels on the 5 GHz to anything other than channel 149 seems to have alleviated most of the problems, but every now and then there are the intermittent disconnections between the Apple TVs and the clients. I will be updating this post once I have it all completely sorted out.

    An update: As of September 2017, I must say things are looking a lot better, an upgrade of the Meraki Switch and Wireless firmware and OSX upgrade to Sierra, the Apple TV connections feels a lot more stable. The Meraki firmware supports Apple 802.1r and Fast Roaming, which could help alleviate some of the roaming issues. I am still yet to try these out BTW.

    However, I still have concerns about the Meraki switches and the Cisco Core Switch Network not playing nicely with the Virtual Switching System ( VSS ). I am still doing some research to get to the bottom of this. I will update this blog post as soon I find some more

    An Update: As of October 2018, I am seeing much more improvement and stability with the Meraki – Mac – Apple TV. Changes include OSX High Sierra. One thing that really stood out after the Osx upgrade is the Clients don’t keep hopping as much, instead for the most part they were associated with the closest access point and the biggest difference of them was that I noticed most of the clients were also associated with the 5Ghz network instead of the 2.4 Ghz network which cuts the interference by half.

    We also reduced the number of SSID’S per AP from 6 to 4, which may also have helped with the cause – because that is one of the first things that Meraki support asks us to do

    If you are still having problems I would highly suggest trying to look into RF profiling

    https://documentation.meraki.com/MR/Radio_Settings/RF_Profiles